Monday, March 16, 2015

Camera gimbal redux

Now that we have tested the gimbal on our test quad, we redid the whole mounting system. There is a bit of  'Red Green' to the method but it works and it's not ugly, Plus we gained the clearance to remove those landing leg extensions.Although I am still not happy with where the sensors for the gimbal are.

Before:
 After:

 Here is how we did it:

As you may recall, the mounts the gimbal comes with are designed to bolt right onto the DJI Phantom series. The difference in body design mean that the mounting plae is far too wide to use directly on the CX20. there are some ways to do some major cutting and grinding to fit it. This still would have also blocked access to the plug ports on the bottom. Our first 'quick and dirty' installation was fast but had a lot of it's own compromises. Including extending the height of the landing skids.


The CX20 mounting plates are far narrower and while good for clearance, it is not wide enough to allow the gimbal controller board to mount in the same manner.


to move everything forward and keep an unobstructed camera viewing angle, clear of the landing legs, the arms and the props, We wanted to keep the same forward mounted position. so we will be using the rear pair of mounting holes.


The gimbal mount uses larger grommets so they will have to be drilled out, and the gimbal used 2 machine screws that need to be drilled. the mounting holes are ever so slightly too small so a quick drill out on them is important too.

                    Grommet holes = 8.25mm (21/64")
                    Gimbal screw mount holes = 2mm (7/64")
                    Note: use the same 2mm to 'chase' out the stock screw holes near the 2 you just drilled. 

Make sure you clean up the sharp edges after drilling or the grommets will have a very short life.

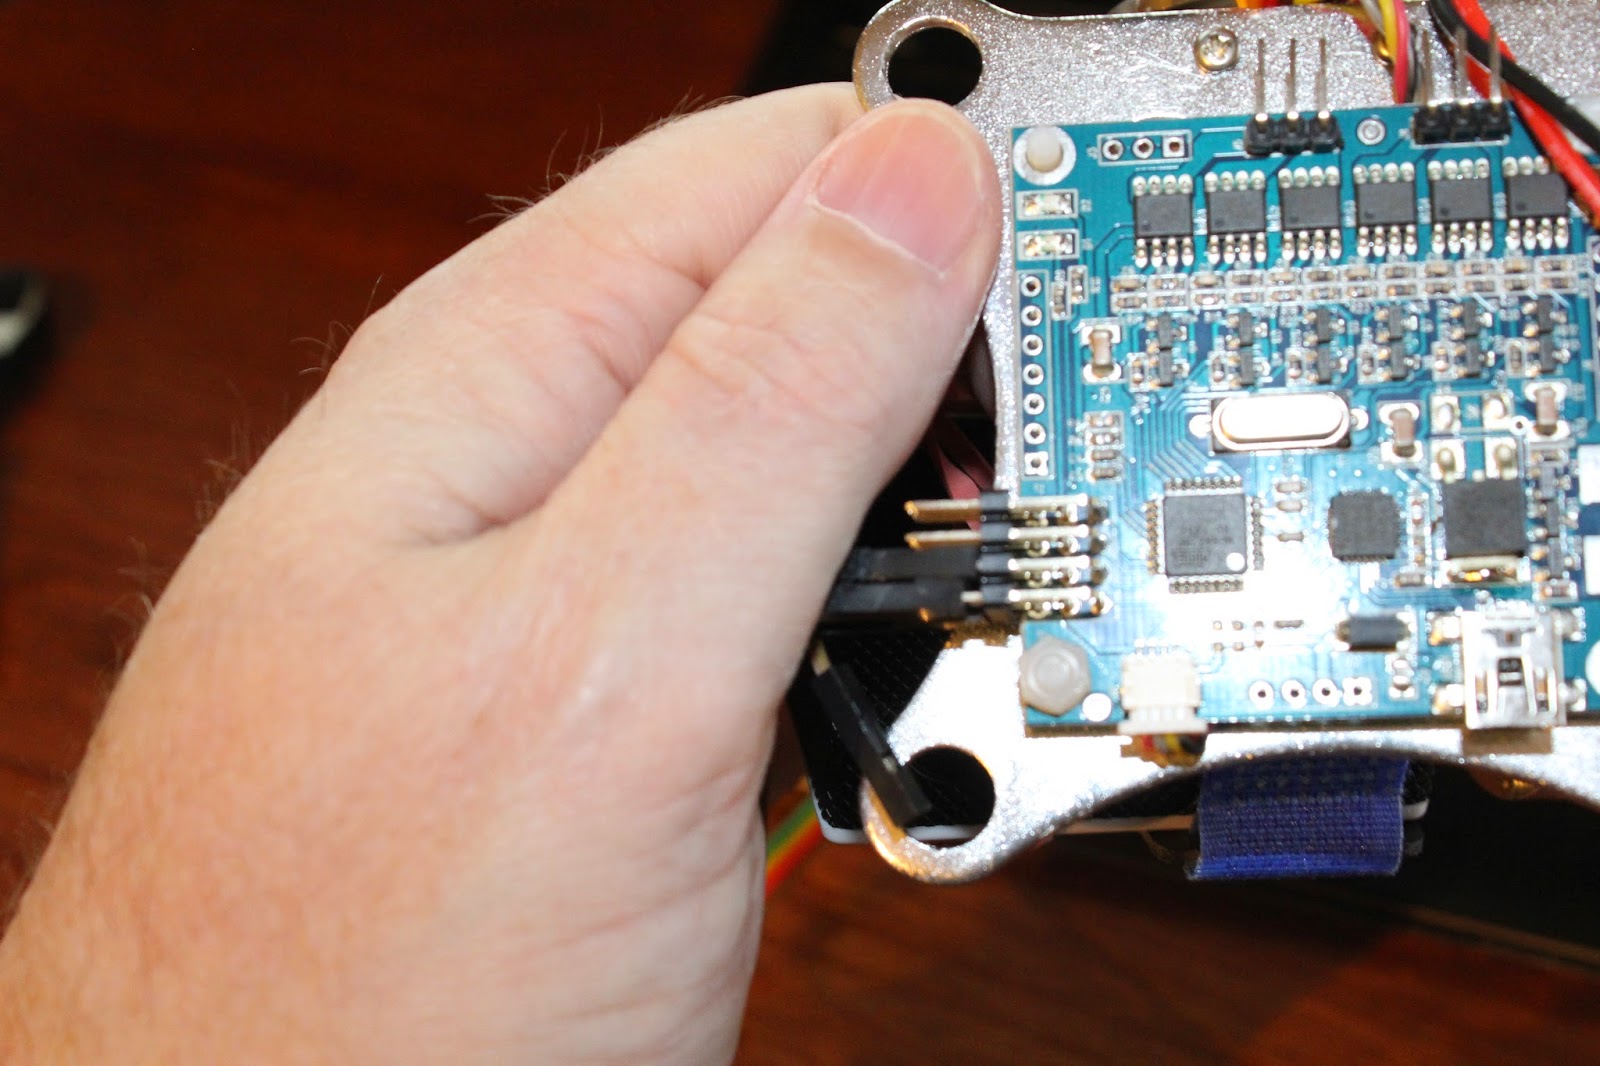

I hope you marked the wires and mounting position of everything.


Attach the grommets in the rear holes of the upper plate and i like to also insert a zip tie loosely through the grommet as insurance. Double sized tape on the front of the belly to help keep things sturdy. If I was planning on opening up the belly of the beast, I would put a bolt through from the inside.


I attached the control board under the lower plate, just some double sided tape. I tried to use a minimal amount. Securing the board from vibration and from rubbing the metal plates is important, and not preventing any of the small electronic parts for getting the cooling air it likes is the trick.


 2 small zip ties keep it from going astray.
...backup support from a long zip tie around the board and the plate never hurts.

Making sure that the rear two grommets are already mounted will make the task of attaching a little less frustrating, but it is a challenge no matter what.

very loosely start the zip tie that goes through the grommet. DO NOT TIGHTEN !!!! or you will remove the whole point of the antivibration grommets. The whole reason for these is in case a grommet fails, you will still have your camera come home with the drone.


And here we have the completed installation, a bit lighter (not a lot) and no need for the extension of the landing gear (more weight and bulk saved).


I strongly suggest some protective wrapping of the gimbal sensors (the tiny circuit board under the gimbal just to the right of the blue velcro strap) this is a quite vulnerable position. I would have preferred that the gimbal bracket camera holder be above and the sensor there instead.


Results:
Ok, looks wise and clearance wise you can see for yourself.
Performance wise: a notable difference. I will have to retest with the flights times, but it react much nicer and seems a lot less encumbered. I would say it's somewhere in between the previous mount (heavily encumbered) and the basic fixed mount (moderately encumbered). it was certainly not the spritely CX20 that we all know and love, but it has some of it's 'oomph' back.
To the point where stripping this thing off is no longer something I 'HAVE TO DO'.
  
.....Now as to the performance: You may recall the last batch of figures, I will repeat and tell you that this helped a LOT!

2700Mah stock battery: 
Clean: 15 minutes
Fixed Camera: 12 minutes
Gimbal & Camera: 7 minutes.
Redone gimbal: 9:05  minutes

3200Mah Battery:
Clean: 17 minutes
Fixed Camera:
14:15
Gimbal & Camera: 10 minutes.
Redone gimbal: 10:55 minutes


That is a 2 minute gain !

Now as to the performance and handling:

Clean: Very responsive. quite nimble. less than half throttle and it's still climbing.
Fixed Camera: a slight bit less sporty but still very active. about half throttle to climb
Gimbal & Camera: noticeably more sedate. Much less responsive. 60%+ throttle to hover.
Redone gimbal: Performance although obviously feeling encumbered, is not feeling like it is near it's limit. a lot of the handling has returned so some extent.

Additional Note:
One observation I have is that the SJ4000 camera uses a micro USB connection instad of a Mini USB like the GoPro cameras do. The location of the camera on the gimbal make it difficult to connect this camera for live video feed or FPV without a big of fiddling around. Had the USB connector been on the other side of the camera, or the pitch motor been on the other side, things would have been a lot simpler.


Friday, March 13, 2015

CX20 telemetry ongoing.

A few entries ago we added a telemetry unit to the CX20. We opted for an internal installation to keep the craft looking clean and to protect the electronics.

The CX20 comes in a variety of configurations internally. Most people opt for the 'open' configuration because it offers the most options for modifications and tuning. Some of the other versions are typically more 'ready to go', more reliability and consistency. The added benefits mean that mods and addons are not always possible.
The 'Open' version uses an altered APM (autopilot). These altered units are capable of pretty much anything you could want it to do. The tradeoff is that they have been changed from regular configuration in many cases and there is a lot more tinkering required 'under the hood'. to enable some of the abilities. This is a bit of a problem for people that just want to put the battery in and fly. It's a true hobbyist tinkerer's setup. If you are willing to do a lot of digging and searching for answers, you can get a very adaptable custom platform that can grow with you and more importantly, you usually pay a lot less and you really know the way it works.
Another tradeoff is that the 'open' version comes in several different combinations. The variety means that even though it's an open version, what specific parts does it have and how will it integrate with any extras you wish to add.
In the case of our CX20 test craft, despite being very similar to ones that other owners have had success with, we could not get it to work properly with the telemetry unit. While the superbly supportive group of CX 20 owners online had all sorts of idea, we persued every one of them and all failed to get the stubborn module to work with the system. After some discussion, we decided to change the APM to a more consistant one in very popular use. This is one of the most popular models on the market. It's very much the one that many others are based on.

Apm 2.6.inputs

This one is also a perfect base line (in our opinion) that can be adapted easily for almost all equipment we will be testing.

It should be an almost direct swapout with the one already in the CX20. It is also the same as the heart of the upcoming Big Bird Build.

So the telemetry in the CX20 will be on hold until this gets installed. and the complexity of installing the telemetry in this is simply plugging the transmitter to the socket on the far left. No soldering, no digging through forums to resolve how to configure it.

A gimbal for your thoughts......

Ok folks here is the update on the gimbal. We got a 2D gimbal (BGC 2.2) and installed it on out Cheerson CX20 test rig, then performed our tests. Here are the results with our present test gear:

2700Mah stock battery: 
Clean: 15 minutes
Fixed Camera: 12 minutes
Gimbal & Camera: 7 minutes.

3200Mah Battery:
Clean: 17 minutes
Fixed Camera: 14:15
Gimbal & Camera: 10 minutes.

Now as to the performance and handling:

Clean: Very responsive. quite nimble. less than half throttle and it's still climbing.
Fixed Camera: a slight bit less sporty but still very active. about half throttle to climb
Gimbal & Camera: noticeably more sedate. Much less responsive. 60%+ throttle to hover.

Having a good look at the reasons, The fixed mount requires the steel mounting plates, the antivibration system and the protective camera case. The steel is thin due to it's strength and it doesn't need to be thick (& heavy) to do the job well. The protective camera case does give the camera a much better chance of survival in a crash but it does add weight.

For those that may be unclear on what a gimbal does, It automatically adjusts and compensates fore movement, for example: If you hold a bird in your hand, as you rotate it around, it will keep it's head steady and level. This makes taking pictures and especially video much better to watch.


This particular gimbal used in our testing weighs in at about 200 grams on it's own. For those still using the imperial system, that's almost half a pound, BEFORE including the camera. Factor in as well that the gimbal uses power to self level and if you tilt, it draws more power. (always try and get the camera as balanced as possible without power. It helps a lot).

                       The fixed mount on the left,          The gimbal on the right


The next thing that we ran into is that mounting this system had it's own challenges. It could not use the stock mounting location without blocking the very plugins needed to operate it.


 There was no satisfactory mounting options for this without some modifications and/or improvising. In the end we opted for attaching the mount further forward by attaching the mounting to the plate of the fixed camera mount.
 The factory CX20 camera mount
 The BGC 2.2 mount is much wider and MUCH heavier.


We used the standoffs to avoid any drilling (we did have to slightly widen 2 holes and drill one) This gave us a sturdy installation with the benefit that it's far less likely to see the rotor arms or landing gear in the shot.

 Hmm, what if we combine the 2?

 The standoffs come with the Gimbal.

 By mixing the 2 systems together, it works....at a cost.
 Remarkably sturdy 


Of course there is a few downsides. It alters the weight and balance. the front props have to carry a little bit more of the load than the back ones. not much, but it's there. The next factor was that we added even more weight (never a good thing) and finally, the standoffs took away the very tiny ground clearance between the bottom of the gimbal and the ground, It was literally resting on the ground. the worst of that is that the accelerometer for the gimbal is an open circuit board and contact with the ground (especially if wet) is a very bad thing.


2 points to note here: The camera is secured with a velcro strap and a collar that secures it by the  lens. A rubber band is a cheap backup plan. An if you notice the rubber vibration isolator on the left, a zip tie is loosely run through the rubber. If the rubber was to pull out of the plate, the nylon strap will make sure you don't come home with parts missing.

Option 1: Redo the mounting setup, drill lots of holes. A messy complicated bunch of changes.
Option 2: Use a different gimbal. going to be more money. This model is quite well priced. and since most parts come from China, Typically taking 3-5 weeks to arrive,
Option 3: Modify/ replace the landing gear. This was the option chosen. Apparently the landing gear from the Phantom series will fit and is taller. but again a long delay getting them....So a 15 minute solution was done in the workshop. I cut some lightweight 1/8 inch thick plywood. add a few blocks of 1/4" plywood where the dowel would connect the two halves. Drill holes for zip ties and we are in business.
Downside? it adds more weight again. It's not the prettiest or sleekest thing.
Upside? the gimbal and it's electronics are safer. The solution took minutes with what was on hand. And one of my gripes was addressed. The CX20 landing gear/skids are effectively only 12 cm long, even though they appear to be over 18. They are rounded and as a result, it can be prone to tipping forward or back. This is of particular concern if you land with any forward speed. Your props will hit the ground. This makes that much less of an issue.


As a  camera platform, the extra weight and the more sedate response make the quad better from a stability point of view. but it costs you a lot in endurance.

Now after a lot of discussion, there are a few options of using a different and possibly more efficient prop. We are going to do some measurements with some different prop options in a later segment.

My personal feelings on the matter (and a few others seem to be begrudgingly agreeing) that while this size of quad (350 class) can certainly carry a camera. This particular setup is heavy and is compromising the operation too much. If you look at the design of this gimbal, It could have been made of much thinner and lighter metal (it's aluminum alloy but a heavy one). There are many types of sturdy plastics that would be more than sufficient and would cut the weight down by an estimated third or better. Even the materials used do not need to be over 4mm thick for carrying a camera so light. When you are shopping for yours, make sure it is well under 200g.


PS. When we did our flight testing, the extended landing gear worked great.


We will be looking at lighter and more suitable gimbals, but this one will probably be put aside for the big build. (an upcoming series here)


Sunday, March 8, 2015

Cheap and safe way to crash.

Ask any pilot and they will tell you that experience is your best asset. Mistakes are the harshest but best teachers. But since few of us have infinitely deep pockets, and we value people and property, a simulator is a great way to have your first few mistakes. There are a few great simulators that use actual transmitter style inputs for ma realistic feel. There are others that let you use your own transmitter with a plug or adapter to connect to the computer. This is the best option since it is the transmitter with the exact weight and feel and switch arrangement that you fly with.

Click here for one example, Phoenix Flight simulator lets you fly a number of RC aircraft including Drones/Quadcopters/Multirotors.

We hope to test some of these in the near future and give you the full rundown on them.

But say you want to try something for free (yes, your ears perked up there) There are a number of free Drone flight simulators on the Goggle Play store for Android users (phones and tablets).

Now bear in mind that you do not get the feel of the transmitter, The feedback of feeling where the centrepoint of the controls is missing since you are sliding thumbs on a glass screen. All the same, you DO get to see and understand what your inputs do under various conditions.

Here are the ones we tried:

Quadcopter Flight Simulator.

+ Good Graphics.
+ Ground and FPV viewpoints.
+ Has many features like Alt Hold, and Auto Return.

- You have to pay for more drones and locations.


3D Drone Flight Simulator:

+ Cute graphics.

- It's just a game, a basic game
- Mode 1 only


Quadcopter Simulator:

+ OK Graphics.

- Could not get it into English mode
- Does not appear to be mode 2.
- This is another game, not a simulator.
- I had to restart my tablet to exit.

RC Land Free:

+ OK Graphics.
+ Not entirely unrealistic control responses.
+ Fun Challenges

- Still gamelike.

Indoor Heli Sim:

+ Realistic controls.
+ some decent options for control sensitivity


- Very limited selection of aircraft.
- Graphics are VERY basic.


RC Quadcopter Park Simulator:

+ OK Graphics.

- Just a very basic game.
- Completely unrealistic controls.


That's the freebies we tried. From experience, flying without actual spring loaded joysticks is never going to give you the true feel of the real thing, But it can give yous some practice on those 'no fly' days when the weather is too bad or you are waiting for that critical part in the mail.


Saturday, March 7, 2015

Cheerson CX20 Camera mounting

Here we install the SJ4000 camera. It's a GoPro like camera and is an affordable alternative.

In this installment, we are using a combination of the camera mount that comes with the CX20 and part of the massive array of mounting options that come with the SJ4000.

First off, There is a fine steel cable that comes with the camera. I call this a 'no cry' cable. In case of various events, you should not lose the camera. I attach one end through the bolt for the landing skid.

The Cheerson camera plate (and the aftermarket units) come with rubber antivibration mounts. Connect the plates together BEFORE you try and attach the plates to the Quadcopter. The camera has to be mounted in the protective housing. There are no mounting points directly on the camera itself. Remove the mounting foot and use the CX20's mounting foot (the while plastic part attached below the camera).
Before you attach the plate to the CX20, attach the white mounting foot to the plate. Attach the plates to the bottom of the CX20. with the 2 screws.
Thread the 'no cry' cable through the plate furthest from the CX20. Loop the other end through the other landing skid mount. If the rubber grommets fail, the camera will not leave the quad, and you won't cry about losing the camera.


So now we are all set. We can take video from the air. You tell the camera to start filming, then take off. In this simple setup, you do not have control of the camera in flight. You also have to either take the camera out and hook it up to the computer or take the memory card out and put that in your computer. If you opted for the SJ5000, it has WiFi and you can transmit to your phone or tablet.
If you want to want total control of the camera from the air, you will be better off with a GoPro or a   gimbal mount. (stay tuned for our extended blog on that)


Now in case you are wondering why we did not use the rest of the camera mount that came with the CX20..........

The Cheerson camera holder is meant for a thinner camera. The SJ4000 is 4mm too thick to fit.

 
Update. Upon examining the screws that hold the foot to the anti vibration mount, the threads are barely touching the nylon inserts that keep the screws from loosening. A little thread lock compound resolved that, and just to hedge the bet, I took one end of the metal cable (the 'No cry' strap) and threaded it in the camera foot. This way if the plate were to pull from the grommets OR the foot came unscrewed from the plate, the cable would save all.

Cheerson CX20 testing and modding

Our long term testing of the CX20 continues.

This entry, we have had some very good flights.... and one scary moment. The CX20 is very responsive. Many have found that gently taking off can often lead to a 'tip over'. Most suggest giving it a leap into the sky and throttling back to where you want. This sounds far more dramatic than it really is. That being said, if you pay attention, you can readily take off gently, just pay attention if it starts leaning.
Flying the CX 20 in the different modes is interesting, The 'headless' mode (it will go away from you or directly to you. Based on where the motors were armed. regardless of which way it is pointing). It can be easier, but if you are trying to fly by what way it's pointing, you can get messed up. Altitude hold means it will try and keep the same altitude while you fly whatever direction you like. I tried hover which is a position lock, It is supposed to stay exactly where it was when you engaged that mode. If you are moving or not completely still, it can go awry.
Just to see how responsive the CX 20 is, I got it in a comfy hover, then slammed the throttle to full. It rocketed straight up at an astounding rate.
We have also started testing flight times.
With the stock battery (2700Mah), and no accessories attached, Flight time was a solid 15 minutes.
With the 3200Mah battery, we measured a 17 and half minute flight.

With the SJ4000 Camera attached using the fixed base, we only lost 3 minutes of flight time off of each battery. That's not bad. It still rockets upward when told to but slightly slower. When we use the gimbal mount, it should give us a good idea what you can expect.

When choosing a gimbal, weight is a huge factor. These craft literally hang on the propellers. More weight cuts into handling and endurance far more quickly than on a fixed wing aircraft. And when the battery gets low LAND, don't push for that extra minute of flight time of you are just setting yourself up for some repairs at the very least. One Youtube video showed a pilot with hiw quad up about 80 metres (around 250 feet). He kept flying and flying after the low battery warning came on. Finally it just dropped like a stone. The damage looked like a complete write off. 


As we add accessories, flight times will continue to be checked to compare how much these items affect duration. 


NOTE: there is a big update to this. Skip to the end of this article to see details.

Of the accessories we are adding, a 433Mhz telemetry module is the first added. Most people run the wires through one of the holes in the hull and attach the telemetry transmitter to the outside of the craft. We opted for an internal mount. It looks cleaner and compared to the usual external mount, it's not harder to do.


First off. look at the space inside. To help minimize the chance of interference with the radio control, the opposite side from the antennas was chosen. You can see how small the transmitter is on the desk to the right.
There is plenty of space here and it does not interfere with any of the electronics. 
Triple check, the antenna is in a good place and doesn't interfere with the landing skid.


The size of the antenna base is carefully measured.  15/64th of an inch makes for a tight fit. Drill the hole from the inside to out. That way when the bit penetrates,  it will not damage internal components.


The location works great. The antenna is oriented to swing back. A bit of hot glue around the transmitter inside gives a little more strength. Probably not needed but a little strength isn't a bad thing if it doesn't add much weight.

Now it's time to get to the surgical part of this exercise. Snip the Zip tie that secures the cap of the FC.

The lid snaps off with little effort. Don't lose the foam underneath. It moderates the air to the barometer/altimeter.

To avoid removing (and possibly mis locating) the wires into the FC, a clamp holds the circuit board at a better angle to work on it.


for this part, you have to make sure you are connecting the correct wires to the right points on the board. This is some delicate soldering. If you don't have the skills or the right tools, it's worth it to find and pay someone who is good with this fine work.

put the board back to the position it was in before. Make sure the foam is covering the barometer again before you close the case. I used side cutters to nibble off a small section of the case right below where the USB connecter plugs in to allow for the wires.

I bared a section of the output signal wire and spliced in an extra wire (white) for later. Don't forget to put a new Zapstrap on the case for the FC.

Everything looks neat and in place.


The antenna fits perfectly and doesn't get in the way.
Close her up and you are set.

STOP THE PRESSES !!!!!!

There are several series of the CX20 (And Quantum Nova), and many of them use slightly different hardware. Getting the telemetry to work on our testbed didn't work, (there have been a few things that stubbornly defied us) but Jordan Worley in one of the Quadcopter groups on Facebook dug in deep and got to the heart of the matter. There have been a few well intentioned articles on getting telemetry installed on the CX20/Quantum Nova series and he uncovered some things that explain a lot. Many of the previous articles are incorrect or incomplete. Here is his revised version that is making it work for people 

Telemetry mod

And if you haven't joined already, this Facebook group is a great and fun loving bunch that freely share knowledge and tips to grow this hobby.
Facebook Link


Do you remember that white wire We spliced in?
In an upcoming entry we will be adding 2 video systems. One will be a gimbal mounted camera and that will stream video to our groundstation. Our setup will be a laptop computer. The Telemetry transmitter sends it's signal to a USB receiver so that it can display the information (if desired) on any video transmitted and recorded.
A second, lightweight fixed FPV camera will be mounted and the white wire will give the same data to the flight display.
When doing camera work, the operator can get disoriented with the camera tilting and moving. The fixed camera makes sure you have a fixed point or reference while angling the filming camera.