Thursday, February 26, 2015

Still working on the CX20

We are still working on giving you more on our ongoing review of the Cheerson CX20.
In the mean time, this gem came across our desk and we have to share it with you:

 World’s first portable Auto-follow & FPV Drone, routes flights, one key take off & landing, auto return, full carbon fiber material cast & sports car dynamics and texture, Designed for sports enthusiasts, outdoor fans and indie moviemakers, put it in your bag and enjoy your wonderful life now.


When we get our hands on one, we will offer a full review. It looks like a very nice and very complete unit. Foldable arms, 'follow me' mode and smartphone connection. 


Friday, February 20, 2015

Review in progress Cheerson CX20

Also known as the Quantum Nova, and various other names. This is one of the most successful Phantom clones on the market in its various forms. There are more people rebranding this with slight variations than you can shake a stick at.

This is a GPS equipped full featured unit that can do almost anything including autopilot flight. You can use the Mission Planner software and  use it for automated areal surveying, searching, air photography and video. It's really a great budget platform to do almost anything.  It is based on the open source system so although you can fly it right out of the box, some tinkering can and should be done to get the most out of it.

It's a true 350mm + size unit and can be kitted with telemetry, GoPro type cameras, GoPro type cameras on Gimbals, FPV Camera & transmitters. You can even have a gimbal mounted GoPro camera AND a fixed FPV camera. It will readily carry that. There are just so many addons that this one can take that it boggles the mind.

Price as tested: $ 289.99 (watch prices, it's cost changes frequently)
There are several versions out there. I opted for the Open source MX + GPS version listed as the Auto Pathfinder. Is's pretty complete.
There are versions that come without the radio set for less money but they involve a lot more tinkering and if this is your first bigger quad, or your very first one quad at all, then you should avoid that version. 


We just got this one and a few of the addon components should be here next week so this will be an ongoing review as we add things and tweak them so stay tuned.


This is what we can report so far:


The following is what we called a "Acceptance inspection". In the Air Force, whenever an aircraft was delivered to another unit. it is inspected thoroughly.
If you are not comfortable performing this level of disassembly on your quad, or if you don't have the skills to do so safely, i urge you to find someone that can help or do this inspection for you.
For optimum use of time. Attach your battery to the provided (or an upgraded aftermarket charger).
Once the battery is attached, then plug the charger in.

Important:  Follow safe handling procedures for LiPo batteries.

Initial Acceptance Inspection:


If you pop the cover off of the GPS mast (the GPS is actually inside the main body) You will find the Magnetometer. It's the drones onboard compass. By putting it up here, it is not influenced by the rest of the onboard electronics. If you are going to open the body (and I insist on doing so for a detailed inspection when any new drones arrive) you must unplug the magnetometer. Make sure the actual sensor is VERY secure, it is one of the parts that if it comes loose in flight, you could end up in trouble. This was secured with double sided foam tape AND hot glue. This is GOOD.

Opening the body:

There is an included tool, a multitip screwdriver. One double ended part is the Allen key. The smaller tip is for the small screw at the very end of each arm. the tool is rather soft metal and easily damaged. I opted to leave the tip screws out.
The middle of the round part are the motor mount screws. They are the larger of the Allen key sizes. You do not need to remove them. Just make sure they are not loose. Avoid excess force. 'Finger tight' is the ideal level of torque.  The next 2 screws just before the round part of the arm and the one near the main body are the next to come out. Make sure that the clear lenses covering the LEDs is fully snapped in place.


The inside components:

Flip the CX20 back onto it's belly and gently remove the upper half, being especially careful of the wires for the magnetometer. You can now see the interior.

In each arm is the ESC (Electronic Speed Control) for each motor. They are the long skinny circuit board. It also holds the arm LEDs.
The silvery square in the main body is the GPS sensor. This location is actually quite good. I got satellite lock in seconds where you can actually end up waiting up to 2 minutes.
The white box under the GPS module is the radio control receiver. Both GPS and RX are held in place with double sided foam tape and a small zip tie (This is GOOD.
The rectangular box is the APM (Auto Pilot Module) and runs the whole craft. make sure it is very secure as well. Mine is held with double sided foam tape and a small zip tie (This is GOOD).
The foam tape absorbs some of the vibrations as well as secures the components. On the far side of the APM is a mini USB cable. It runs to a small board at the belly. It has the connections for the camera and gimbal and whatever other accessories you decide to add.

Here is a closeup of the interior.
Make sure all plugs are secure, Inspect all solder joints to make sure they are in good shape. Sometimes a poor joint can occur and the few minutes inspection here could prevent a lot of damage and frustration.

You should also make note of the numbers on the ESCs (the green circuit boards in the arms, close to the motors). Write this down somewhere and make sure the model and version numbers all match. If they are at all different, that may make it difficult to get them calibrated. This may not be necessary so I suggest you only perform this calibration if you really think you need to or if there are problems;

http://copter.ardupilot.com/wiki/initial-setup/esc-motor/

Tip:
You can also see the transmitter. I have added a 'cheat sheet' guide to the switches. I did not use the wording in the manual but terms that I personally consider easier to remember. 
Radial means that no matter what direction the quad is pointed, operated based on radial directions from the transmitter. If  I push the stick forward, it flies away from me, no matter where the front is aimed. This can be a good setting for less experienced pilots and it really is pretty easy. You don't have to worry about orientation on a craft that looks the same at every angle. 
Military members will know that RTB means 'Return To Base'.


Now that I am satisfied that everything is secure, the body is reassembled. Making sure that the wires for the Magnetometer are fed into the mast (carefully). All screws redone, but again ONLY finger tight. If you overtighten, then things will break or pull out of where they go. Make sure you reconnect the magnetometer (MAG for short) and snap the cover back on.

Note there are 2 antennae. This has a diversity receiver. If there is a better signal from one over the other, it will select that signal for control. This is a much safer system than just one. It can also give you better control if you are at the limits of range (try to avoid being in that situation though).

This is a little better view of the plugs on the belly of the CX20


The landing struts are attached with simple thumbscrews, Make sure to route the antennae into the grooves and notches provided. do NOT overtighten the thumbscrews.

The propellers go on to specific motors. there is a little arrow on each arm. The clockwise arrows are on the arms with the black acorn nut on the motor The correct propeller for this is the 'A' on them. For ease of identification, I marked the bub of the propellers with black permanent marker. The Motor shafts are keyed (they have a flat section) so the props can only go on one way. Make sure to tighten with the wrench, but again, only finger tight. You will notice that the black nuts are left hand threaded so you can't really mix them up. When all is said and done, you should have the black at opposite arms. 


The transmitter (Tx) is a 6 channel model. 4 channels are the sticks and the two knobs between the sticks and the antenna are for whatever you add. Most typically they are used for the camera gimbal. If installed (look for an upcoming entry), you can tilt the camera side to side plus up and down by adjusting the knobs.
There are also 2 switches  one at each upper corner of the transmitter. The combination of their settings can perform several functions. for example: if you set the left switch up and the right one all the way down, the CX20 will automatically return to where you took off. This can literally save the unit in many circumstances. I made up a simple reminder chart that I have taped onto my transmitter.

I suggest you look at the Mission Planner software at this point. This is just a few of the many excellent tutorials on YouTube that explain how to set it up.

Note: if your APM is made by Fatshark, the software and procedure is a little different.

http://diydrones.com/profiles/blogs/successful-test-of-the-cheerson-cx-20-apm-arducoper-firmware

https://www.youtube.com/watch?v=JMSwDUrns2Q


More to come. Please check back later.


Review Syma X5C-1

a product review of the Syma X5C-1.

Price as tested: $60.00 Cdn.
Prices vary so keep an eye out, you can sometimes get them for under $50.


As mentioned before. We really like this one.

Pros:
It has very stable manners in the air.
It can still perform stunts.
It can be very fast.
Sturdy construction.
Comes with propeller guards.
Photo/Video camera included. Reasonable resolution.
Easier to see than some in this overall size range.
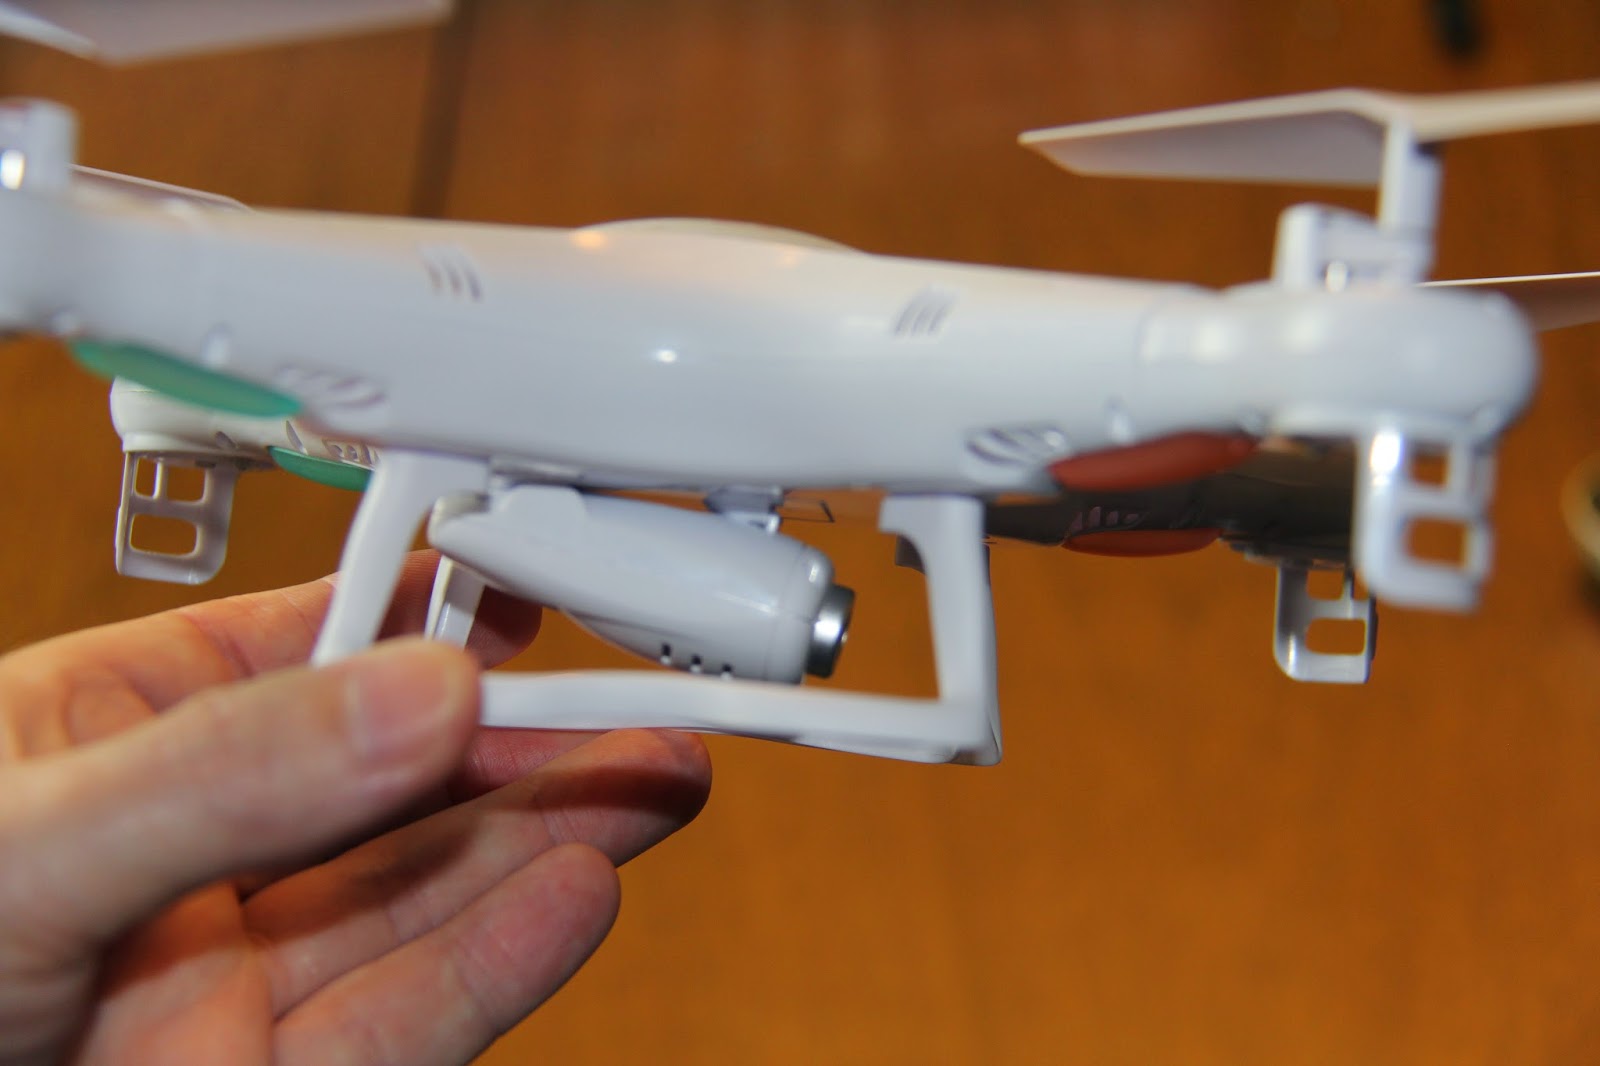
The Camera and landing struts can be removed for better performance
It has a Power switch.

Cons:
Tends to be easily affected by the wind.
Not as great a radio range as I would like.


Overall:
This would make for an excellent first Quadcopter. It handles well, is predictable and is an excellent platform to hone your skills for when you might go into the next larger class (250-350mm+)


It just needs 4 AA batteries (for the transmitter), and it's ready to fly.Even spare props are provided.


 On the right is the stock 500Mah 3.7 volt LiPo battery. It will last about 6 minutes if you are not using the camera. You will probably want to order a few extra batteries. If so, also get the group charger. It can charge up to 5 at once. A full charge takes several hours. The additional batteries are typically 650Mah and last about 8 minutes if you are not using the camera.


The stock battery fits with ease. The slightly larger additional batteries are a snug fit.


It resembles a baby Phantom.


As you can see, the motor is geared for better performance. If you slam the throttle, this one really skyrockets up there. Be careful of the range though or be prepared to wave goodbye.

I urge you to put your phone number on yours with permanent marker.


Some people don't like that the camera is tilted down. If you want sweeping horizon shots it can be a problem but you can reposition the camera to a shallower angle.


The transmitter functions well andIi never have more than 2 seconds for the Tx and Rx to bind. There is an LCD at the bottom that tells you the transmitter battery level, and the trim settings. The bottons on each side of the screen are dummies, just there for looks.

On the shoulders of the TX are 2 buttons. The left one is for toggling dual rates (how  responsive it is) and the right is for making it do a flip. It also commands the camera (as does the throttle trim button).
It works well but it does feel light and cheap.


Wednesday, February 11, 2015

Props to you...Props to us all !

This post will be about Propellers.
This is a light introduction into it for those that want to start getting into the technical aspects. If you just want to go and have fun, then this is probably an entry you will want to skip.
Some might call them rotors, airscrews, whatever. I am not going to go into a lengthy detailed scientific discussion on aerodynamic theory that is over most peoples heads (myself included). I am just going to mention the short and basic things that we should keep in mind. The propeller is basically a wing, The wing can have many different shapes. The shapes determine what the desired performance is.


There is no 'perfect' design. To gain an advantage in one way, it often costs you in others. This is another of the grand compromises that there are so many of in most aircraft. If you look at wing designs, the long slender wing has a greater efficiency in lift. but at a certain point as we design them longer, it is difficult to give it enough strength. And there is more drag. The thickness and shape (Planform (NACA) Chord (distance front to back) all affect what the wing will be better at. The profile is also a factor as seen in the illustration above. The far left is a basic standard propeller, a 'jack of all trades'. The next two are a swept forward and a swept back design. The fourth one is called a Scimitar blade. The advantages to that are in the way it deals with the tip vortices (spiraling airflow). Generally on the scales we are working with, they offer little if any advantage. The one on the far right is a newer design that seems to offer advantages for us. I'll explain why at the end of this entry.


You have to remember that the root of the propeller (nearest the middle) although turning at the same speed as the rest of the propeller is actually travelling less of a distance per revolution. It is therfore effectively travelling through less air. As we get to the tip, it is going very fast, At some RPM, the tip can be breaking the sound barrier. in the above illustration, we can see that propellers are at different angles depending on how far from the hub it is. So if you were designing a propeller, you want a shallow wing design that is meant for very high speeds. and near the root, you want a broad wing that is at a steep angle to grab all the air it can.
If we look at a regular aircraft wing, there is an average to what the whole wing is angled at and shaped at as well as how thick it is. This is called the "Mean Aerodynamic Chord" or MAC.
Propellers for models are mostly listed in the form of  '1104' for example. That means it is an 11 inch diameter propeller and the MAC is at an angle of 04. The '04' is not degrees but a relative angle for comparison. So a 04 is shallower than a 05 but less than a 03, etc. we call it the 'Pitch' of the prop.
The ideal prop configuration is determined by what engine is turning it. If you have too big a prop for your motor, it will not be able to get it to the speed where it works best. And also consider if you put too big a prop on your quad, it may not be able to turn without hitting something on the craft.


How Many
The next fun to know thing is how many blades it has. That would seem like something simple and it can be. But now you have to consider efficiency. The most efficient would be a single blade. propeller. But the thrust from it would be in a spiral and would shake the plane (assuming you could balance it properly) , A 2 blade design is the most logical choice. now IF you need the clearance, you can go down a size and go to a 3 blade prop. You will gain the clearance but the prop will not be as efficient. It will turn a bit slower and make the motor work a bit harder. This will cut down your flight time on a quad. The same goes again for a 4 bladed or more design. Airplanes use the multibladed designs because the size of prop that the engine can turn would be impractical. The propellers would be hitting the ground. The V-22 Osprey has a large 3 bladed prop because it can tilt them out of the way. It could be more efficient with a 2 bladed design, but then the wings would have to be several feet longer and the RPM would be high it would be noisy.


Now some of you might be thinking "Hold on, what about the turbine type ducted fans?" They turn at an extremely high speed, and they are in a shroud that helps direct the air to the blades better. But in a thrust per watt of power basis, they are much poorer on efficiency. They are better at high speed flight too. A propeller can really bight into the air at lower speeds. . For an example. your electric fan, It moves the air in the room. It moves a lot of air. but you can't blow up a balloon with it.


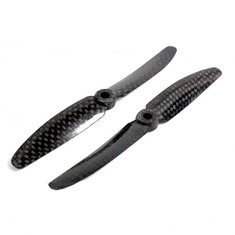
5x3 Carbon Fiber Propellers 5030 For QAV250 ZMR250 240 Mini Quadcopter


Walkera QR Y100 RC Quadcopter Parts Propellers QR Y100-Z-01

Product Details


Propeller materials:

Propellers can be made of wood, various types of plastic or metal. In this hobby metal props are not used and that is a good thing. There is no reason to have a metal blade on these and they can be dangerous.
Wood is ok but not as resiliant as the plastic types.
Of the plastic types, there is a soft plastic (almost a vinyl and soft) they are only used on the smaller indoor types. They are less likely to damage anything or hurt someone.
Hard plastic (Nylon) is the most common. it offers light weight. stiff  and strong.
It is affordable, pretty consistant in size and shape but still retains a small amount of 'give'. It can cause injuries at high RPM 
Carbon Fibre is on the larger and higher end props. It is the strongest and stiffest (short of metal) so it's shape and angles remain constant. It is also the most expensive and it is stiff enough that you can get seriously injured if at high RPM.

Once you get to 250mm class or larger, you will be dealing with only the nylon and the carbon fibre props.


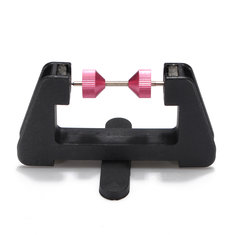
ATG A-1 Propeller Balancer Magnetic Essential For Quadcopter FPV Prop
Du-Bro 499 Tru-Spin Prop Balancer


Get Balanced
It is important to balance your props on the 250mm and up, even if they came attached to your Quad. An unbalanced prop will shake the airframe and could cause damage. It can also be a cause of 'jello' effect when taking video. A prop balancer is pretty cheap and I consider them essential. There are many types. I prefer the magnetic type, a point on one side is drawn to a magnet, another magnet pulles on the other side but does not quite touch. This is the lowest friction and lets you see where you have an imbalance the best in my humble opinion. When balancing, you can sand off a tiny bit of material from the back of the heavy side, at the inner 1/3rd. Or you could apply tape to the light side (it's not a good idea to sand Carbon Fibre props. If the dust gets into your lungs, it does not break down).
If the prop halves are not equal in length than you can carefully sand the tip to make them match, Just make sure you keep the same profile. The amount of material that has to be removed is very little. If it's a big difference, then you might want to retire that prop. Some people advocate adding weight (not just tape) to the prop. In my opinion, if that weight ever 'let go' it would probably be flung pretty far and pretty fast. The potential for injury make me shy away from this.


Summary

 Ok, I took a few liberties with the science there to make it simple to understand. There is a lot more to all this but it doesn't really help us out in this hobby. So as a rule, try to stick with what the motor manufacturer suggests for prop size and pitch. If you need to go outside that, then I suggest you stick with changing the diameter no more than one inch up or down. If you need more clearance, then perhaps go down a size and make it a 3 bladed prop. This should work for your application but try and measure. That bigger prop might give you a few hundred grams more lift but shorten the battery life by a few minutes.

This is all probably more than you ever cared to know, yet I have barely scratched the surface of this subject. 

 
I promised early on that I would explain why the prop on the far right of the first illustration is a better design for our hobby. The narrow chord at the tip makes for smaller tip vortices. The tip Vortices can cause a lot of drag on the propeller and reduce thrust. The broad chord near the root make sure that the prob is grabbing a lot of air where it might normally have trouble pushing much air.   


This is my preference for prop balancing. The Top Flite magnetic balancer. It works on any medium to large prop. it is virtually frictionless since the rod is suspended by magnets. It does not work on very small props and it also doesn't work on props that do not have a through hole (built in nut).
http://www.top-flite.com/accys/topq5700.html 


That's it for now.

Saturday, February 7, 2015

Taking Pictures and Video

Before we get to the 'nuts and bolts' lets just take a moment and think about respecting peoples property and privacy. There is nothing wrong with taking pictures from a drone over your own property, or in public places (as long as you don't endanger or become an obvious pest). Flying over someone elses' property and taking pictures is a whole different matter.
One of the biggest hurdles we face in this hobby is that of reasonable people that are concerned that some paparazzi is going to be hovering outside their 10th floor apartment window. Sure it is technically possible. but a telescope from the apartment across the street would be cheaper and easier. But that does little to ease that concern over privacy.
And lets not forget that flying a larger drone, especially with the stiff carbon fibre props can cause injury. So fly safe and we won't be forcing the feds to clamp down with very restrictive regulations.

OK, now lets talk about FPV...First Person View.
This is a way of having a 'pilot seat view' of what you are doing with your drone. This is probably one of the most useful applications of our hobby. Taking pictures and video from places and angles that only a helicopter could get to. Sometimes where even they cannot go. A decent FPV setup lets you see what you are taking pictures of. You can see if the sun is reflecting too strongly from that angle. You can tell if what you are taking pictures of is properly in view. In the fall of 2014 severe rains in Washington state threatened some homes in a cliff side area. Drones were able to let the people see the conditions and in doing so, posed no risk to a person that otherwise would have had to rappel down to survey the conditions. (yet another important thing this hobby can do).
Now with an FPV system, you can adjust and get the pictures you want. with a fixed camera system, you have to 'best guess' the camera angles and conditions. As you might guess, the fixed camera system is a lot less expensive and much simpler than an FPV system. That being said you have to also bear in mind that the more weight and power demands on the battery, the shorter the flight time and typically the worse you quad will feel to fly.
         Now before the hatemail starts flowing, please bear in mind that this is an overview, I am talking about the general way things work. Sure someone probably has the mythical 'Wundercopter' that can fly forever with a full FPV setup and flies fantastic when loaded down, but by far, most are going to be affected in a negative way to some extent. probably not a lot but there is a difference.
         Ok, back to the subject at hand. We have so far reviewed the:
Walkera QR W100S with fixed FPV camera.
Syma X5C-1 with fixed camera.

Both can take video and still pictures. The differences are vast however. The Walkera tested is an entry level system (they make some class leading professional systems too). The video is sent to your smartphone or tablet. The picture quality is poor and the frame rate is very low. I personally don't see how you can fly it in FPV mode. You can take pictures and video for later review but you really HAVE to fly it visually and with a standard transmitter. Be aware of short range.
The Syma H5C-1 has a camera for still pictures and video. They claim it is an HD camera. I dispute that, but it's still decent quality. The pictures and video are saved to a mini SD memory card and you have to put it in your computer or tablet to see the pictures & video. The camera is fixed in position but on the ground, there are ways to reposition it. You can also remove the camera completely to save a little weight.
An FPV system lets you fly like you are actually in the drone. The frame rate is good enough that you can easily keep track of what is going on. Complete flights can be made without even seeing the drone itself. but it is STRONGLY suggested that you have a spotter keeping real time eyes on the drone. If you lose signal, you will have to figure out where it is and you might not have the time before it's on (or IN) the ground.
Systems for viewing the video signal are either goggles or a screen. The screen lets several people see what is going on, the goggles are a one person setup, but you are not trying to see past any glare or reflections. The goggles mean that if you lose signal and need to take them off to see the drone, you have to take a hand off the transmitter at a time when that is not the best thing to do. You have to decide on where the tradeoff makes more sense.
So next off, lets decide on the image type and quality. Are you just enjoying the flying? are you after decent quality images or are you after professional level stuff? The basic fixed camera setup is going to be fine for most people. A sports camera (GoPro or similar) Offers a much better quality picture. They have a variety from an easily affordable one with respectable resolution, and up. Some models go up to 4K (Ultra High Definition)...at an according price. And there are similar looking versions from other manufacturers that are often cheaper.
Do you want the camera to be able to move seperate from the drone? You will need a gimbal system. It lets you adjust the camera angle and they also compensate for the movement of the dron. Way you are fighting a wind. The drone has to lean into the gusts. The resulting video could make it hard to enjoy. Some people might get motion sick. A Gimbal system compensates with it's motors and solid state gyros to give you a pretty steady picture. Again, the fancier systems, the higher the price.
Now for FPV, you have to send this picture to you (the pilot). For that, you will need a transmitter. and to get the pictures on the ground, you will need a receiver. Do yourself a favor and upgrade the antennae. The stock ones are usually the black "rubber duckie" ones. They work ok, but there are conditions that they can drop signal, and their range although not bad, could be better. The omnidirectional 'mushroom' type (if covered) or the 'Eggbeater' (uncovered) will offer a better signal and is a LOT better if the drone flies at funny angles. They are pretty cheap so it's worthwhile. Pay attention to the mounting size, type and gender when ordering. You will need power on the receiver too. Now the screen, Are you going to get a dedicated screen? 3.5"-10" are available for a reasonable price. Some have the receiver built in.to save some hairpulling. I chose to use a laptop. I just added a USB Video input adapter. For your first FPV setup, get a complete set. ordering the components can make for a lot of frustration and triple checking compatability. A little poking around Youtube will show you what I mean.
Then there is Telemetry. It's a handy thing to know your altitude, battery status, heading, etc. A telemetry set will give you a virtual cockpit worth of helpful information.

Now that it's all together:
OK, Great. Now you can see what you are taking pictures and video of. You can adjust the angles in flight. You can take pictures of the cliffside. You now have a very elaborate means of taking epic selfies.
With this equipment, you can now download the flight controller software (free) and you can plot your flight. You set waypoints and select altitudes for those waypoints. It will follow your commands. You can even use the software to fly a pattern over a specific area to perform a survey of that area. You tell it the field of view of the camera and the altitude and the software will determine the best pattern to fly, how many passes and it will determine it to allow just a bit of overlap. All automatically. Just remember, if it loses signal in flight, you can set it to automatically fly back to the launch point and autoland. This is a vast are of possibilities and can make our hobby into a potential business. At the very least, a very useful tool for some tasks.
I will provide links to the components I am using and when I have a chance, I will also post videos of the assembly and test flights. in a few weeks. There is other stuff I think you might get some use from first.

Disclaimer: The following is a general component list. By no means is it an endorsement of the specific products or the suppliers. Always check for compatability. I take no responsibility for the system or the way it works for you. There are other units available that may work better for you
Check for legality in your Country Province and Municipality etc.  


Transmitter & receiver
Note: The receiver apparently gets warm so a heatsink (aluminum mounting plate) would not be a bad idea.
It is suggested that you ensure a 5.8Ghz 200mw or better strength.  The set above is 600mw.

5.8G 4 Leaves Omnidirectional Gain Antenna For Receiver
Antenna option 1    Note, Ensure you have the correct connection, Be aware that there is a specific unit for the transmitter and a different one for the receiver
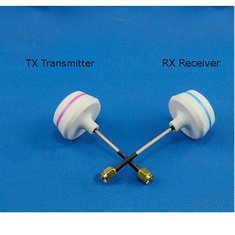

5.8Ghz FPV Mushroom Omnidirectional Antenna TX/RX Set
Antenna option 2  Note: ensure you order the correct connector type. This set comes as a set, 1 for the transmitter, 1 for the receiver.


 Viewscreen


Viewscreen with receiver      (check compatability with transmitter)


Fatshark Predator V2 FPV Headset System Video Goggle


Goggles 
This is a Fatshark set that looks complete. I would personally change the antennae.


Laptop USB adapter      (if not using a dedicated screen)


FPV 1/3 Inch HD Color CMOS 600TVL Mini Camera NTSC
Mini Camera 
Note: Make sure you order NTSC for North America, NOT PAL
It is advised by many to get a Wide Angle Lense. Typically about $ 5.00


Camera

This is a great option for those that want something like the GoPro but at less cost.
This model can record or transmit but not both at the same time.


Camera Mounts. The basic fixed position camera can be mounted in all sorts of ways. I won't waste your time explaining. Just be safe and maybe have a secondary means of securing it.


Gimbal mount
To allow positioning of the camera in a different direction than the drone is flying. Also compensates for movement of the drone. Makes video much more stable.


Telemetry
This set is for working with the laptop.
The transmitter has to be soldered to the CX20 Drone


The Drone
This FPV system is going on is this. It comes with a fixed mount for the camera already. But I am adding the Gimbal system for versatility.


Wednesday, February 4, 2015

Sharing knowledge and opinions

If you have the chance to join a group of drone pilots locally, I DO encourage you to do so. There is always so much to learn. Yes a lot can be gleaned from researching on the internet and Youtube. There is still a lot more to be gained from an actual human being or group. They can not only save you many hours (and dollars) by showing you what works and what doesn't, they can also help you make sense of a few aspects to this hobby that there are just no easy to find answers to. Some things might be poorly explained online, or poorly translated. Sometimes just being able to show someone a component and ask a question can save a lot of headscratching. Some of you might be golfers and having some good guidance on correcting faults in your swing can make a big difference. The same thing applies to this. It is especially so if you are modifying or building your own drone. And if you pick up tips from other people on Youtube, please be nice. They are often posting a video of a mistake they made that caused a crash. We all make mistakes. That guy showed you one of his, Hopefully to help you see what he did wrong and not repeat the same mistake. If you think he was stupid for doing something, it probably seemed like an OK thing at the time. How many of us can claim that we never did something we shouldn't have. If you have something to say, make sure you are not bugging him about it. Ask a legit question. There may be a reason you never thought of.

And at the same time, remember that some things people say are pure opinion. Again, no reason to start an arguement. Say Fred says "Only buy a genuine Phantom 2+, anything else is total garbage". Then George says "Bah, the XYZ 3000 is just as good at half the price". they both may have reasons to feel that way.
Using that fictitious example, the Phantom series has been out for a while and has itself well established. There are a number of lower priced similar models. This lets you get into the hobby with a good unit at a fraction of the price.

....and really, a Buick is a great car, sure it's not a Cadillac, but is it really that different?

Ordering from 'out of country'

Here is something I would suggest you keep an eye on.
Shipping and Handling fees
Some companies offer better prices on the items in question. But this savings is to be watched. I give you this example. I ordered a few parts from China (different distributors. one actually has the parts in Holland). and so far every one has charged little shipping and NO handling fee. a part that is $6.00 is delivered for less than $2 postage. A quad came in with a little over $5.00 shipping fee. So i look at ordering a part from the states, list price $11.00 (the price from China is $32.00 and under $3.00 shipping) but that $11.00 part from just a short truck drive away is over $57.00 shipping and handling. With all fees added, that $11.00 part was going to cost me over $70.00 to have in my hands. The same part from China, barely over $35.00.
Now granted, the parts from the states usually arrive in a 3 to 10 days. and the parts from China take 7-21 days. so if you absolutely HAVE to get that item here right away, and money is no object, by all means. As for me, I'll wait a bit longer rather than incur a cripplingly high markup.

It is my suspicion that they are offsetting the price with those 'handling' fees. I am sure you have seen TV ads for various items. They say "If you act now, we will include a second (whatever the product is) for FREE!!!!!, just pay separate shipping and HANDLING"

I am not saying everyone is doing this, just saying BE AWARE.

as with any online purchase, print out receipts, confirmation of payment Shipping notices, etc. and hold onto them. I know of some places that say free shipping...then you get the collect shipping fee upon delivery. Sometimes there may be customs & brokerage charges. That's different. That's 'free trade'.
  

Tuesday, February 3, 2015

Safety thoughts.

Some times in every drone pilots lifetime, you lose a drone, sometimes pilot error, sometimes a technical glitch, sometimes the answer is not as obvious. if you are lucky, you can find it again, sometimes it goes to where you can't recover it. Other times you have no idea where it went. For the smaller ones it's a minor loss, but when you get to the bigger (350mm+ size) you have more of an investment in the unit and you want to invest a lot more into finding it. There are pet and car locators/Trackers that could help you find where the silly thing went. Before you put more gadgets onto it, this might be a good idea.

And speaking of being prepared for the worst, most of us fly near a body of water at some point. Some of us live near the ocean. Some near lakes or rivers. Heck, even a large duck pond. Unless you have the type of Quad that is designed for water, these things sink, Quite rapidly from my research. If there is any real chance of losing it in the water, perhaps adding some sort of floatation device would be a good idea. It could be as simple as some styrofoam or part of a pool noodle. Lightweight, cheap and depending on what you use and how you shape it. there shouldn't be an effect on performance too much. But it could be something that salvages at least some of your investment.

I have even seen some recovery parachutes for Quads. (if you get one, get the largest one you can fit. They will slow it more and reduce damage).

Of course all these things have a cost in performance. There is an old rule in building radio controlled airplanes. It will do what you build it for. If you build it to really fly, it will do that quite well. If you build it to survive crashes, then that is likely the only thing it will do very well.

many of us have prop protectors for a while when learning, R/C helicopter pilots often put radically extended skids on at first. and chances are that most of us had something less than a V12 Ferrari for our first car.

I leave it to you to decided what is important and what is worth more to you, but I can tell you that you will get very little if any teasing if you are a little overcautious at first rather than trying to overfly past your abilities and losing a lot of craft. 

Sunday, February 1, 2015

Online ordering vs Buying from a store

For this entry, I am going to bring up some points that we are all guilty of on one side or the other.

Online ordering.
Pro: often (but not always) the best price due to low overhead. Do your research.
Con: Takes time to arrive, Can be damaged in shipping, You are not always covered if something is defective or damaged, Not always what you wanted/expected.
takes money away from your neighbour, town.

In store purchase.
Pro: You can usually actually see in person the item you are buying. You can make a personal judgement as to the apparent quality. You usually get direct local support from someone right there right away. In many cases, replacement of something damaged or defective is immediate.
You are supporting your local economy and keeping your 'neighbour' working.
Con: Pricing is based on the retailer based on his wholesale cost at time of order. If the market drops, he still paid the previous price to have it in stock. He has to make a living AND pay rent & utilities.  

In this hobby, most things are made overseas. The shipping industry has increased exponentially. Online ordering from a warehouse in China is now not an exotic purchase but an everyday part of life.

BUT: when people buy something online or from a big box store and expect the small 'mom and pop' store to provide free support when they never sold you the item in the first place. That is a form of stealing. The local retailer spends money to keep his store open. He has expenses that don't go away. The online ordering and box box stores have a much higher volume per expense and due to the massive orders they make, they pay less for the items. The local retailer doesn't make the same profit. You are paying more for the fact that he is right there, can usually fix you up, he can go above and beyond to keep you satisfied. He is also there with hard earned knowledge. it has taken time and effort to attain this knowledge. If you are a roofer, would you do someone's roof for free? If you are a auto mechanic,would you rebuild a customers engine for free? You have to make a living. So do they.

Sure you might pay a bit more for the knowledge and service, but it's there. right now.

Now if you think this is unrealistic, do a little math. Since you are obviously into this hobby, could you open a local store that sells quads and drones? Probably not. The cost of rent, the cost of utilities, insurance, accounting, staff, stock. all this adds up fast. Had a bad month sales wise? you still have those expenses. They don't go down either, if anything they go up. There are less and less hobby stores around every day.
 So if your local shop charges a few bucks more for the same thing. There is likely a reason. He's not trying to rip you off so help him out, spend a few bucks and maybe you can have someone local to help figure out why your latest quad just did a death roll.

Update: New Drones inbound

...Send in the drones....

I was all set to order the 'Flying 3D X6', a 250mm sized unit (was at a great price of $ 255.00 Cdn) but when I went to order, the price had jumped to almost $400.00. That put it at more cost than it's bigger brother. The superior X8 version (a 350mm unit) This made me re-research what I wanted to do.
On the one hand, I could wait and see if the price was to come down, on the other hand, based on research and advice from other owners, They suggest different different props and a larger battery. Not large expenses on their own but still... I also found that the camera options on the X6 were good but somewhat limited. The X8 started to look like the way to go with the new price. Either one does offer room to add components (already has telemetry).
As I was digging further, (this hobby requires a lot or research) I stumbled over an ad for for the 'Quantum Nova'. This is a larger (+350mm size). It has almost all the features there are, and has a decent lift ability for larger cameras and a decent endurance as well. What features it DOESN'T have, you can add components. Some will take a little tech savvy, but the upgrade path is there. OK, I was impressed. But we must exercise due diligence. I found that the Cheerson CX20 is the same unit, just a different name tag (think Camaro & Firebird). I was also impressed with the price. All these abilities are available for around $300 Cdn !!!!. Sorry Mastercard, once more, into the breach.
If I had ordered the 3D X6 or X8, I would still be looking at these upgrades eventually (the telemetry, FPV camera etc.). User reviews on all these models are very positive. They all fly very well right out of the box. Some users have made a few suggestions for tweaks on the X6 and X8, I have seen none for the Nova or the CX20. Visit Youtube and see for yourself. Some examples at the bottom of this entry).
Now to settle in for the long wait.... 

Now a few notes about ordering online.
Some of what I am about to say seems like common sense. Some of it might be new to you. My point is, the better and smarter you are about ordering, the less likely you will be disappointed, ripped off or frustrated. It can still happen but lets work at prevention. Just like flying: the crash you prevent is better than the crash you are repairing from.
If you order from big intermediaries like Amazon for example, you are well protected as a consumer. When you are dealing with some North American and many overseas clearing houses/warehouse dealers,  things can go either way. Do some digging. Take review with a grain of salt, read between the lines. are the testimonials legit? are the complaints legit? Sometimes the complaints are from people with unrealistic expectations.
If you are satisfied with the safety of your credit card # in the hands of these companies then order away. Make sure you print out the order sheet and that you are getting EXACTLY what you want. Sometimes there are lesser version of the same unit and you could be left disappointed. Read the fine print. Example: the Syma X5C is NOT the same as a Syma X5C-1...they are very close.
Next thing: carefully look at the shipping and handling fees.  Some places charge a very large handling fee that more than takes up what you save on the item itself. One order of a $300 item might cost $130 to ship from the US and the same thing from Hong Kong $28.00.
Also pay attention to shipping times. If you are patient, a 2-3 week wait is not unreasonable. If you want to pay more for 3 day delivery, it will cost more but you will get it sooner.
When your package arrives, BEFORE you open it. take a picture of ANY damage. If the contents are damaged, this could be important. Open the contents and take more pictures. When opening the inner packaging, inspect and photograph everything again. Most companies will make good on unreasonable shipping damages, especially if it was not packaged well. (see why the pictures are important?). Test the contents out as soon as possible. If there is a dead motor or a landing skid is cracked, the sooner you tell the supplier, the better. If you leave it several weeks, they will be less inclined to get you fixed up.

Below are examples of the units discussed in this entry of the blog. By no means is it an endorsement or advertisement of the respective sources. Merely a reference for the specifications of the units mentioned:


http://www.banggood.com/Flying-3D-Flying3D-X6-6-Axis-2_4G-GPS-RC-Quadcopter-RTF-p-945096.html

http://www.banggood.com/Flying-3D-X8-6-Axis-2_4G-8CH-GPS-FPV-RC-Quadcopter-RTF-p-934779.html

http://www.hobbyking.com/hobbyking/store/__55106__Quanum_Nova_FPV_GPS_Waypoint_QuadCopter_Mode_2_Ready_to_Fly_.html

http://www.gearbest.com/rc-quadcopters/pp_113550.html

Remember that just because I don't mention a particular model or manufacturer, i simply may not be aware of it or have sufficient information to pass on. If I tell you my opinion on something here, it is because I have some first hand or direct second hand knowledge.

A further note here: As of this writing, the X6 is back down in price. This is the one I was going to get as a transition up in size and abilities. In my opinion, this looks like a great transition from the "toylike" class into the serious units. I hate to use the term Toy or Toylike since these units can potentially cause injury or damage under the wrong circumstances.

Youtube videos of the models discussed:
I tried to ensure these are user videos, not company posted
The CX 20/Quantum Nova https://www.youtube.com/watch?v=kjOw2RdzzCo
The Flying 3D X6 https://www.youtube.com/watch?v=EuxWI2OP4m8
The Flying 3D X8 https://www.youtube.com/watch?v=zLjRwREUxTk

A showdown between the X8 and the CX20.
https://www.youtube.com/watch?v=d_Zuvmdv7-g
to my eye, it looks like the Cheerson has a tiny bit less vibration but they are quite similar.

UPDATE: The company I ordered the CX20 from just contacted me before shipping to confirm that i did indeed order this. The double check any order over $100. I am impressed so far.